New Bonnet Latch
134,200 miles, 28th February 2012
Just over 12 months ago I tried to prevent my car's original bonnet latch mechanism (which was approaching 6 years old at the time) from seizing up completely. View Article. This is a common problem with Mk 5 Golf's and if it seizes up completely you can have real difficulty either getting your bonnet open, or closing it afterwards.
The problem is rust forming within the latch mechanism - perhaps unavoidable considering it's position right at the very front of the car. Last time I tried to remove the rust and stop it re-appearing by applying some oil but this didn't turn out to be a long term fix.
After another scare of not being able to close my car's bonnet properly after topping up it's oil level, I popped in to my local VW dealer and discovered that the cost of a brand new replacement latch mechanism was only £27.48 excl VAT. (This included the 10% discount I get on retail parts from VW dealers because I am a member of their free Driver's Club for cars over 3 years old.) This seemed like a reasonable price for the piece of mind of knowing I could open and subsequently close my car's bonnet for at least the next 6 years and so I bought one. VW part number 1K1 823 509 E.
Search eBay now for part number 1K1 823 509
As an eBay Partner, I may be compensated if you make a purchase.


New bonnet catch mechanism. VW part number 1K1 823 509 E, viewed in box, from bottom & top respectively.
Click on photos to enlarge.
Remove old latch assembly
Removing the old latch assembly and fitting the new one is quite easy. Allow 1 hour.
- Remove radiator grille.
Unscrew the two outer torx T25 screws (one circled right) and the unclip the two inner fastenings (one circled right). The grille should then lift off. - Disconnect the bonnet contact switch lead.
The latch assembly comes with an approximately 60cm/2 feet long lead terminated with a plug. This connects into a socket mounted just behind the driver's side headlight (circled left). The plug and socket can be pulled from it's mounting and disconnected.
The lead is secured along it's length to the bodywork in two places by two clips (one circled right). In theory you should be able to just pull the lead out of these clips but I found this a bit tricky and so instead, just pushed the clips off the bodywork with a screwdriver. The clips could then be recovered later when the lead was extracted with the latch mechanism. - Disconnect the short front section of the bonnet release cable.
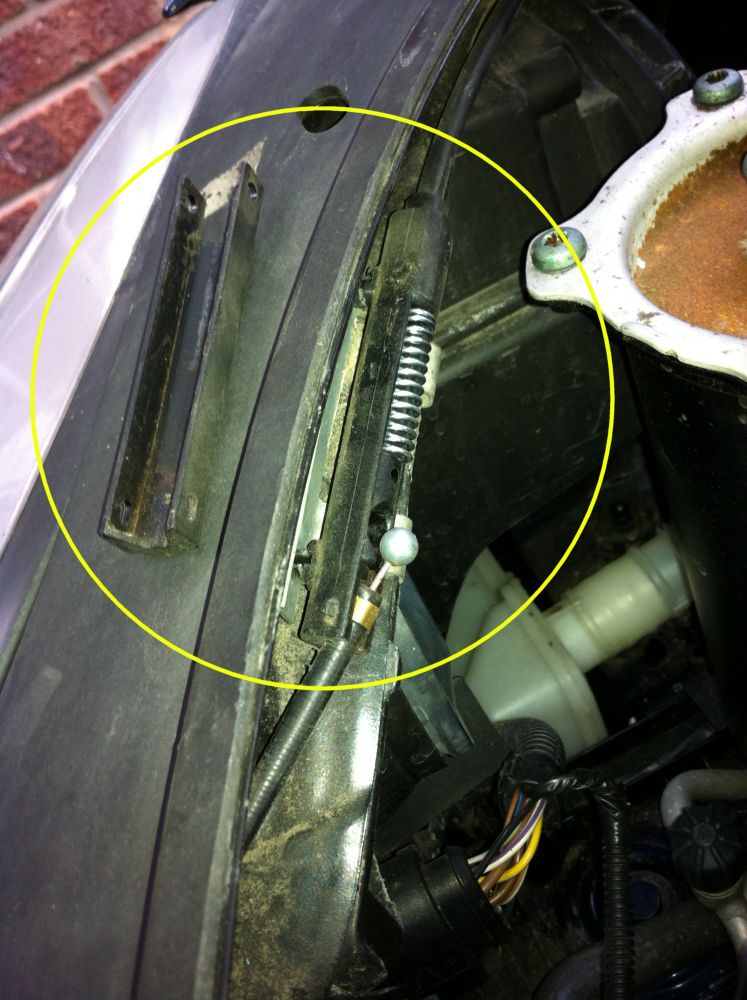
The short front section of the bonnet release cable can be uncoupled (but not removed) in order to give you a bit more slack which makes it easier to detach the other end from the latch mechanism. The coupling is again just behind the driver's side headlight in a 2 inch long narrow sleeve. (sleeve and cover (detached) circled left). This sleeve unfolds and the ball-end of the front section of cable can be popped out. The release cable appears to be fasten to the bodywork somewhere along its length and so should not pull out accidentally. - Remove bonnet latch mechanism.
Unscrew the three T27 torx bolts holding the bonnet latch mechanism in place noting each bolt's position. You should now be able to lift the latch mechanism out far enough to allow you to unhook the release cable. See photo right.
Old latch mechanism with release cable still attached. Note that one of the contact switch wires had corroded and broken.
Click on photo to enlarge.
Note how the plastic guide attached to the end of the release cable attaches to the underside of the latch mechanism before releasing.
Lift the latch assembly out completely pulling the contact switch lead with it. You may need to waggle the lead in order to help it clear any obstacles. You can poke your fingers through from the front to help do this.
Fit new bonnet latch assembly
Refitting is essentially the reversal of removal.
- Connect release cable to new new bonnet latch.
Ensure that the plastic guide attached to the end of the release cable is clipped on to the new latch mechanism. - Reconnect contact switch lead.
Feed the contact switch lead back towards the socket behind the headlight. Plug the contact switch plug into the socket and push back into it's mounting. - Reconnect bonnet release cable.
Reconnect the short front section of the bonnet release cable at the sleeve coupling. - Screw new latch mechanism in place.
Ensure that the plastic guide attached to the end of the release cable does not become detached on fitting. - Test operation of bonnet release.
Do this BEFORE putting the radiator grille back, just in case the bonnet release does not work. If this happens the bonnet can still be opened by unscrewing the bolts holding the latch mechanism in place, lifting the bonnet slightly and poking the exposed latch mechanism with a screwdriver. - Replace radiator grille.


